Date: May 2023
In this tutorial, I am going to show you how to develop a simple Java Servlet MVC web application
with Ajax and Json front-end in Intellij Idea IDE Ultimate edition 2023.1.2. The final product
(i.e. source code) of this tutorial can be downloaded from
here.
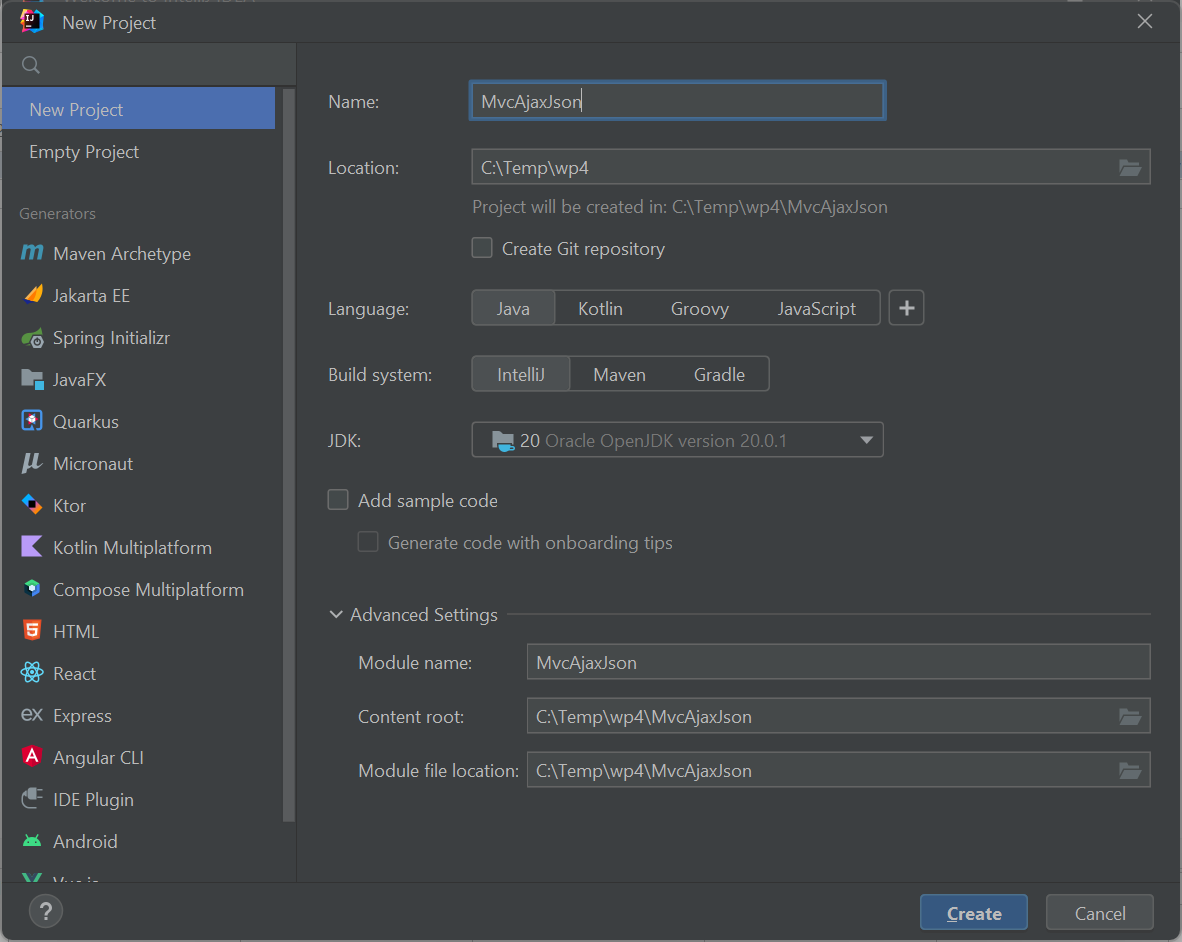
Step 1. Create a new, empty IntelliJ Idea project
First, we create an empty Java project in IntelliJ Idea:
We could have also created a "Jakarta EE" project (using the "Jakarta EE" generator) with a Servlet framework
(which automatically adds a Web application facet - "Facets contain libraries, dependencies, and technologies,
and they provide you with additional UI elements for configuring framework-specific settings"), but we can safely
create a simple, empty project and we add the Web application facet after this.
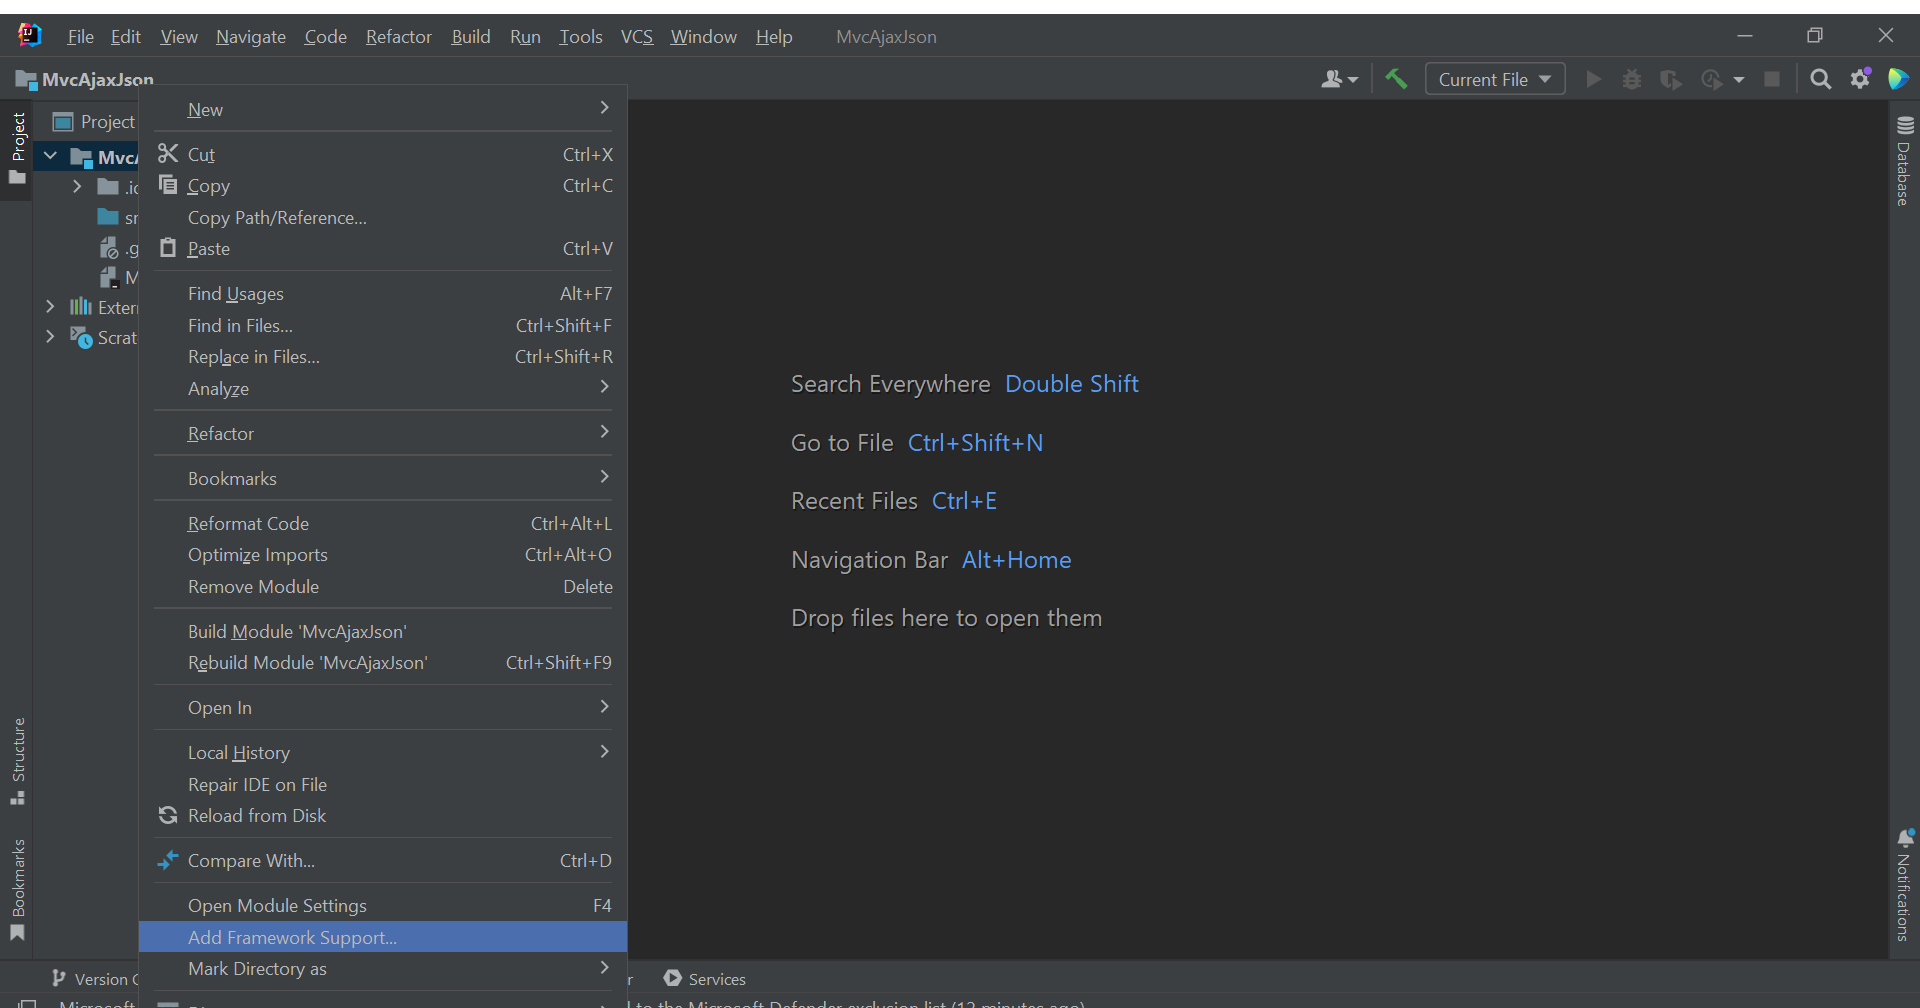
Step 2. Add "Web Application" framework support
Right click on the project name in Project Explorer (on the left panel) and choose "Add framework support":
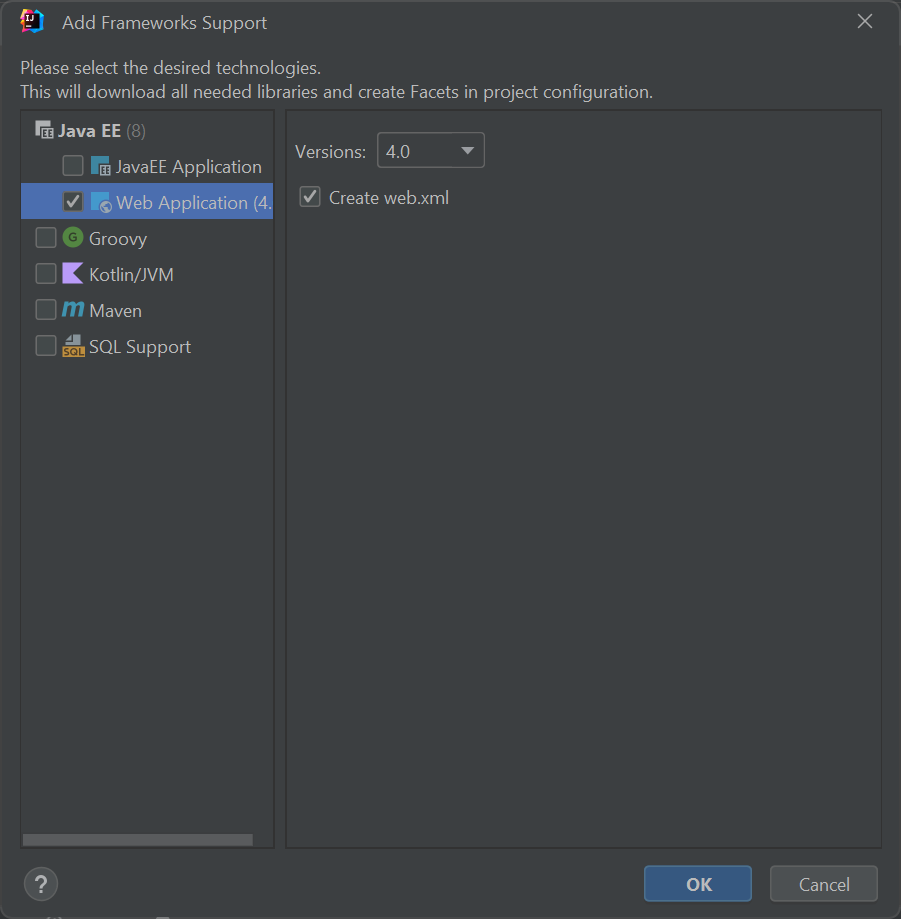
Then select the "Web application" framework (including "Create web.xml" option) and click on the OK button:
.
Now, the project file structure contains an additional "web" directory where we can place the html, css, js, java servlets
and jsp files of the front-end and in the previously existing "src" directory we can place the back-end of our appication.
Step 3. Create the source code for the back-end
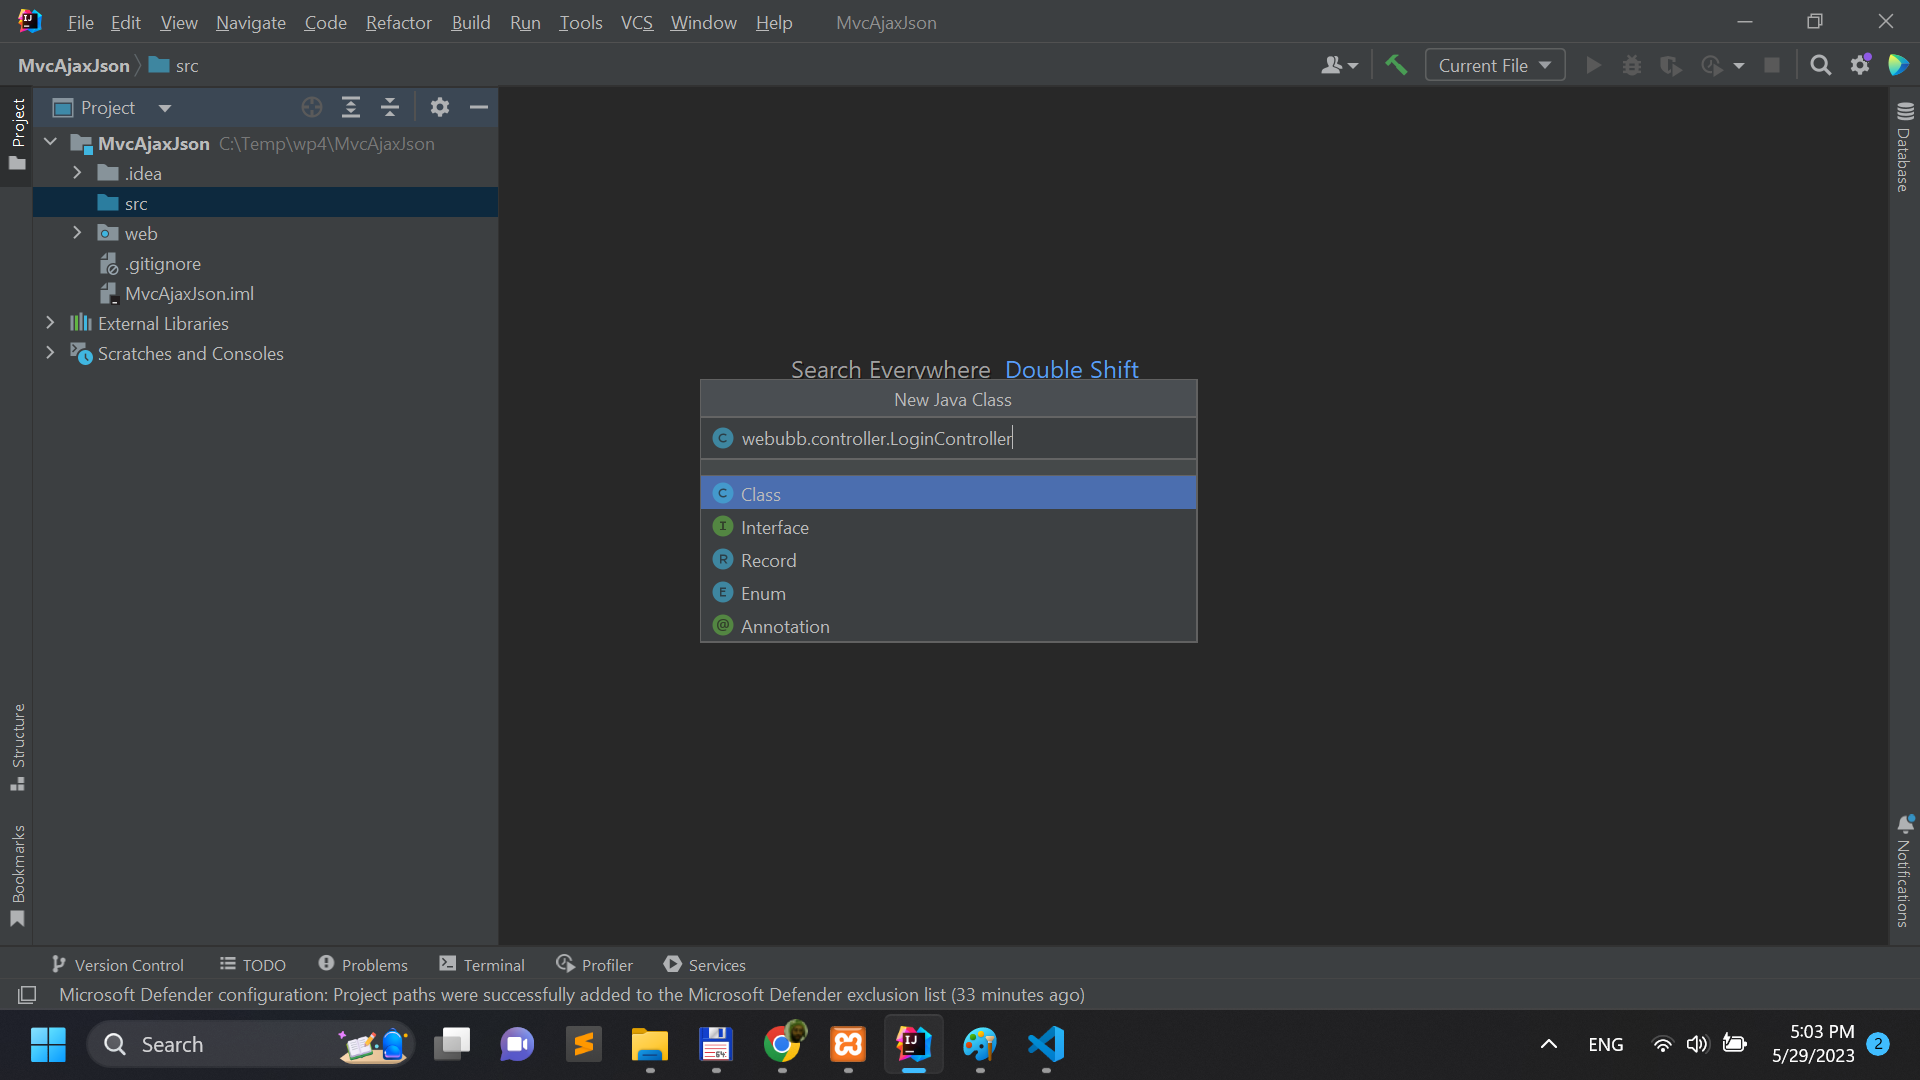
We should write our back-end source code in files under the "src' directory. We should right click
on the "src" directory and select "New\Java class" and specify the name of the new Java class to
be webubb.controller.LoginController:
We could have also created the required packages first (select option select "New\Package") and then add new Java classes.
We write the required source code files until we get to the following file structure:
.
We have two servlet controllers (i.e. Logincontroller and AssetController), two domain classes with setters and getters
(i.e. Asset and User) and a model/repository class for connecting to a MariaDB/Mysql database. The View part in the
MVC (i.e. Model-View-controller) is part of the front-end and will be added to the project and explained later.
For now, if you just pasted in the project the source code (remember, the complete source code for this tutorial is
available
here),
there will be plenty of compile errors signalized by IntelliJ Idea, but these are due to missing libraries that
we will soon be adding to the project.
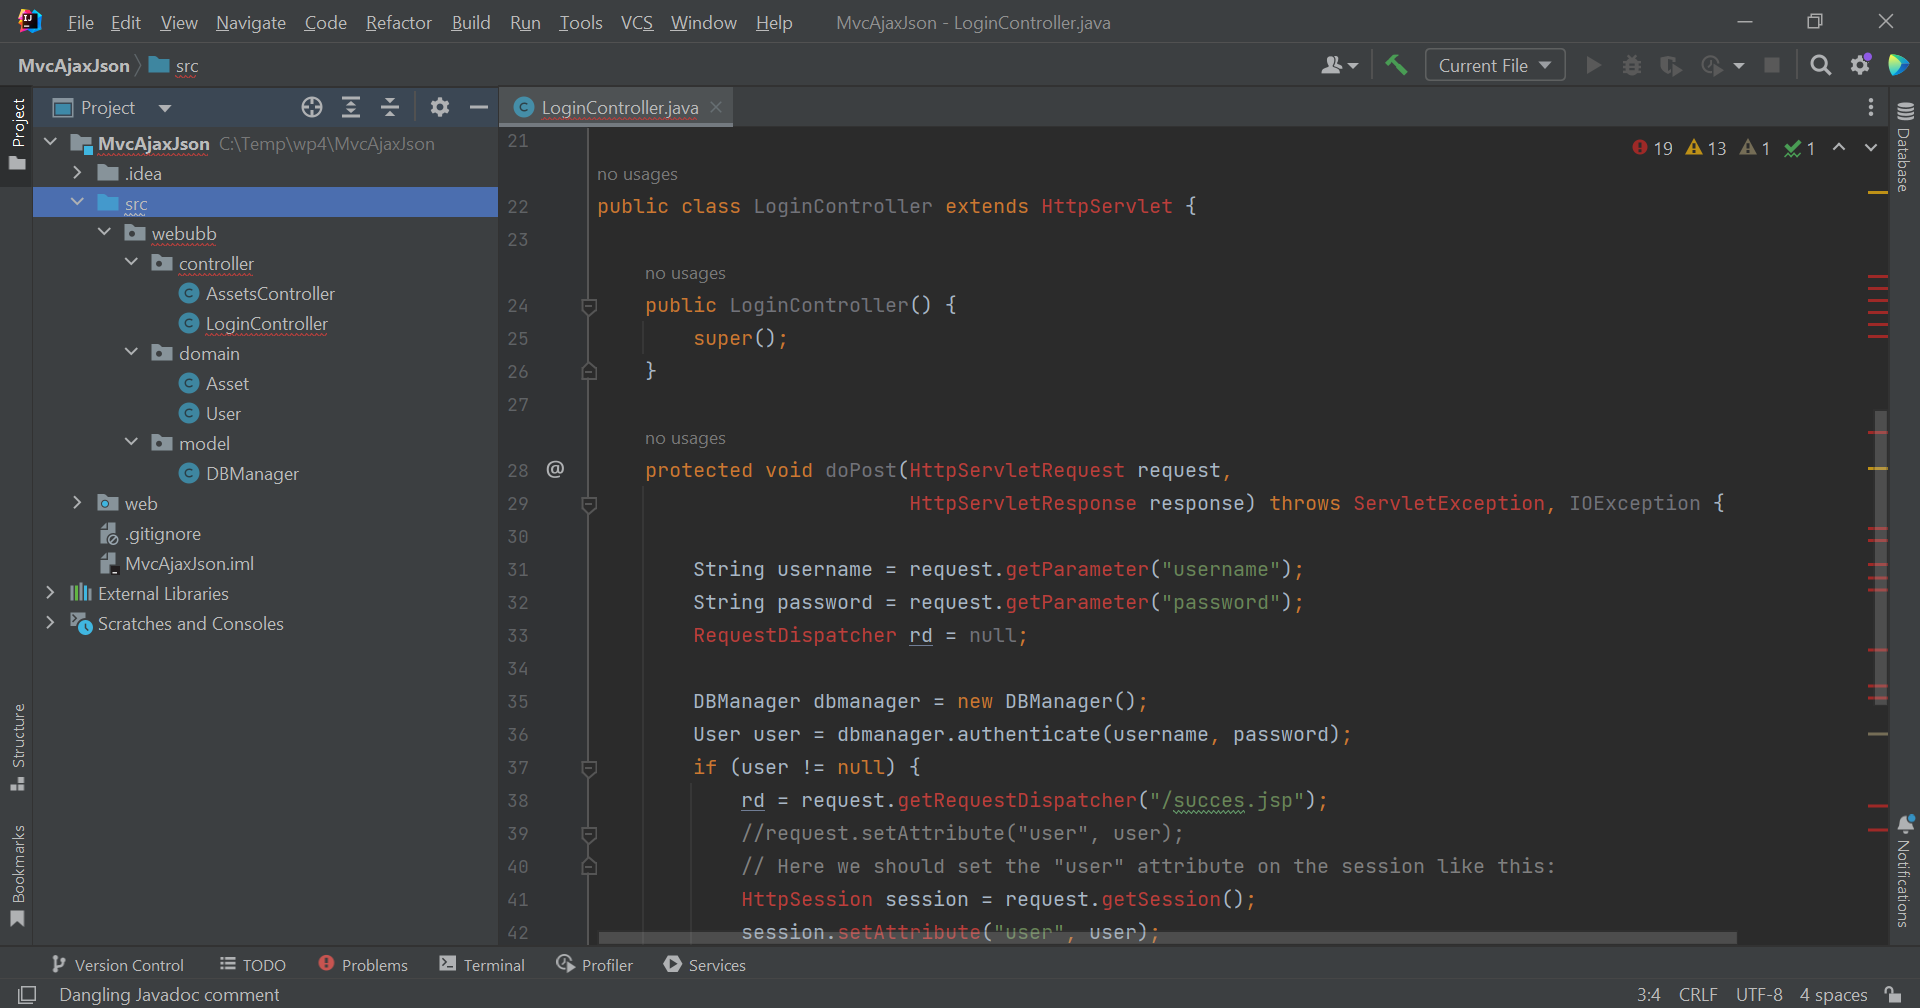
The following code listing displays the LoginController that performs the authentication. A quick note related to the
"import jakarta.servlet.*": if you use a Tomcat version smaller than 9, you should import instead "javax.servlet.*".
The reasons for this is that Tomcat starting from around version 9 moved from the javax.servlet.* to jakarta.servlet.*
package structure for the implementation of the Java Servlets API.
		package webubb.controller;

		import java.io.IOException;

		import jakarta.servlet.RequestDispatcher;
		import jakarta.servlet.ServletException;
		import jakarta.servlet.http.HttpServlet;
		import jakarta.servlet.http.HttpServletRequest;
		import jakarta.servlet.http.HttpServletResponse;
		import jakarta.servlet.http.HttpSession;

		import webubb.model.DBManager;
		import webubb.domain.User;


		public class LoginController extends HttpServlet {

			public LoginController() {
				super();
			}

			protected void doPost(HttpServletRequest request,
							HttpServletResponse response) throws ServletException, IOException {

				String username = request.getParameter("username");
				String password = request.getParameter("password");
				RequestDispatcher rd = null;

				DBManager dbmanager = new DBManager();
				User user = dbmanager.authenticate(username, password);
				if (user != null) {
					rd = request.getRequestDispatcher("/succes.jsp");
					//request.setAttribute("user", user);
					// Here we should set the "user" attribute on the session like this:
					HttpSession session = request.getSession();
					session.setAttribute("user", user);
					// .. and then, in all JSP/Servlet pages we should check if the "user" attribute exists in the session
					// and if not, we should return/exit the method:
					// HttpSession session = request.getSession();
					// String user = session.getAttribute("user");
					// if (user==null || user.equals("")) {
					//        return;
					// }
				} else {
					rd = request.getRequestDispatcher("/error.jsp");
				}
				rd.forward(request, response);
			}

		}
The next controller is the AssetController depicted below:
		package webubb.controller;

		import org.json.simple.JSONArray;
		import org.json.simple.JSONObject;
		import webubb.domain.Asset;
		import webubb.model.DBManager;
		import jakarta.servlet.ServletException;
		import jakarta.servlet.http.HttpServlet;
		import jakarta.servlet.http.HttpServletRequest;
		import jakarta.servlet.http.HttpServletResponse;
		import java.io.IOException;
		import java.io.PrintWriter;
		import java.util.ArrayList;


		public class AssetsController extends HttpServlet {
			protected void doGet(HttpServletRequest request, HttpServletResponse response) throws ServletException, IOException {
				String action = request.getParameter("action");

				if ((action != null) && action.equals("update")) {
					// We update an asset
					Asset asset = new Asset(Integer.parseInt(request.getParameter("id")),
							Integer.parseInt(request.getParameter("userid")),
							request.getParameter("description"),
							Integer.parseInt(request.getParameter("value")));
					DBManager dbmanager = new DBManager();
					Boolean result = dbmanager.updateAsset(asset);
					PrintWriter out = new PrintWriter(response.getOutputStream());
					if (result == true) {
						out.println("Update asset succesfully.");
					} else {
						out.println("Error updating asset!");
					}
					out.flush();
				} else if ((action != null) && action.equals("getAll")) {
					int userid = Integer.parseInt(request.getParameter("userid"));

					response.setContentType("application/json");
					DBManager dbmanager = new DBManager();
					ArrayList assets = dbmanager.getUserAssets(userid);
					JSONArray jsonAssets = new JSONArray();
					for (int i = 0; i < assets.size(); i++) {
						JSONObject jObj = new JSONObject();
						jObj.put("id", assets.get(i).getId());
						jObj.put("userid", assets.get(i).getUserid());
						jObj.put("description", assets.get(i).getDescription());
						jObj.put("value", assets.get(i).getValue());
						jsonAssets.add(jObj);
					}
					PrintWriter out = new PrintWriter(response.getOutputStream());
					out.println(jsonAssets.toJSONString());
					out.flush();
				}
			}

			protected void doPost(HttpServletRequest request, HttpServletResponse response) throws ServletException, IOException {

			}
		}
Following, we have the Asset and User domain classes:
		package webubb.domain;

		public class Asset {
			private int id;
			private int userid;
			private String description;
			private int value;

			public Asset(int id, int userid, String description, int value) {
				this.id = id;
				this.userid = userid;
				this.description = description;
				this.value = value;
			}

			public int getId() {
				return id;
			}

			public void setId(int id) {
				this.id = id;
			}

			public int getUserid() {
				return userid;
			}

			public void setUserid(int userid) {
				this.userid = userid;
			}

			public String getDescription() {
				return description;
			}

			public void setDescription(String description) {
				this.description = description;
			}

			public int getValue() {
				return value;
			}

			public void setValue(int value) {
				this.value = value;
			}
		}
		package webubb.domain;

		public class User {
			private int id;
			private String username;
			private String password;

			public User(int id, String username, String password){
				this.id = id;
				this.username = username;
				this.password = password;
			}

			public int getId() { return id; }

			public void setId(int id) { this.id=id; }

			public String getUsername() {
				return username;
			}

			public void setUsername(String username) {
				this.username = username;
			}

			public String getPassword() {
				return password;
			}

			public void setPassword(String password) {
				this.password = password;
			}

		}
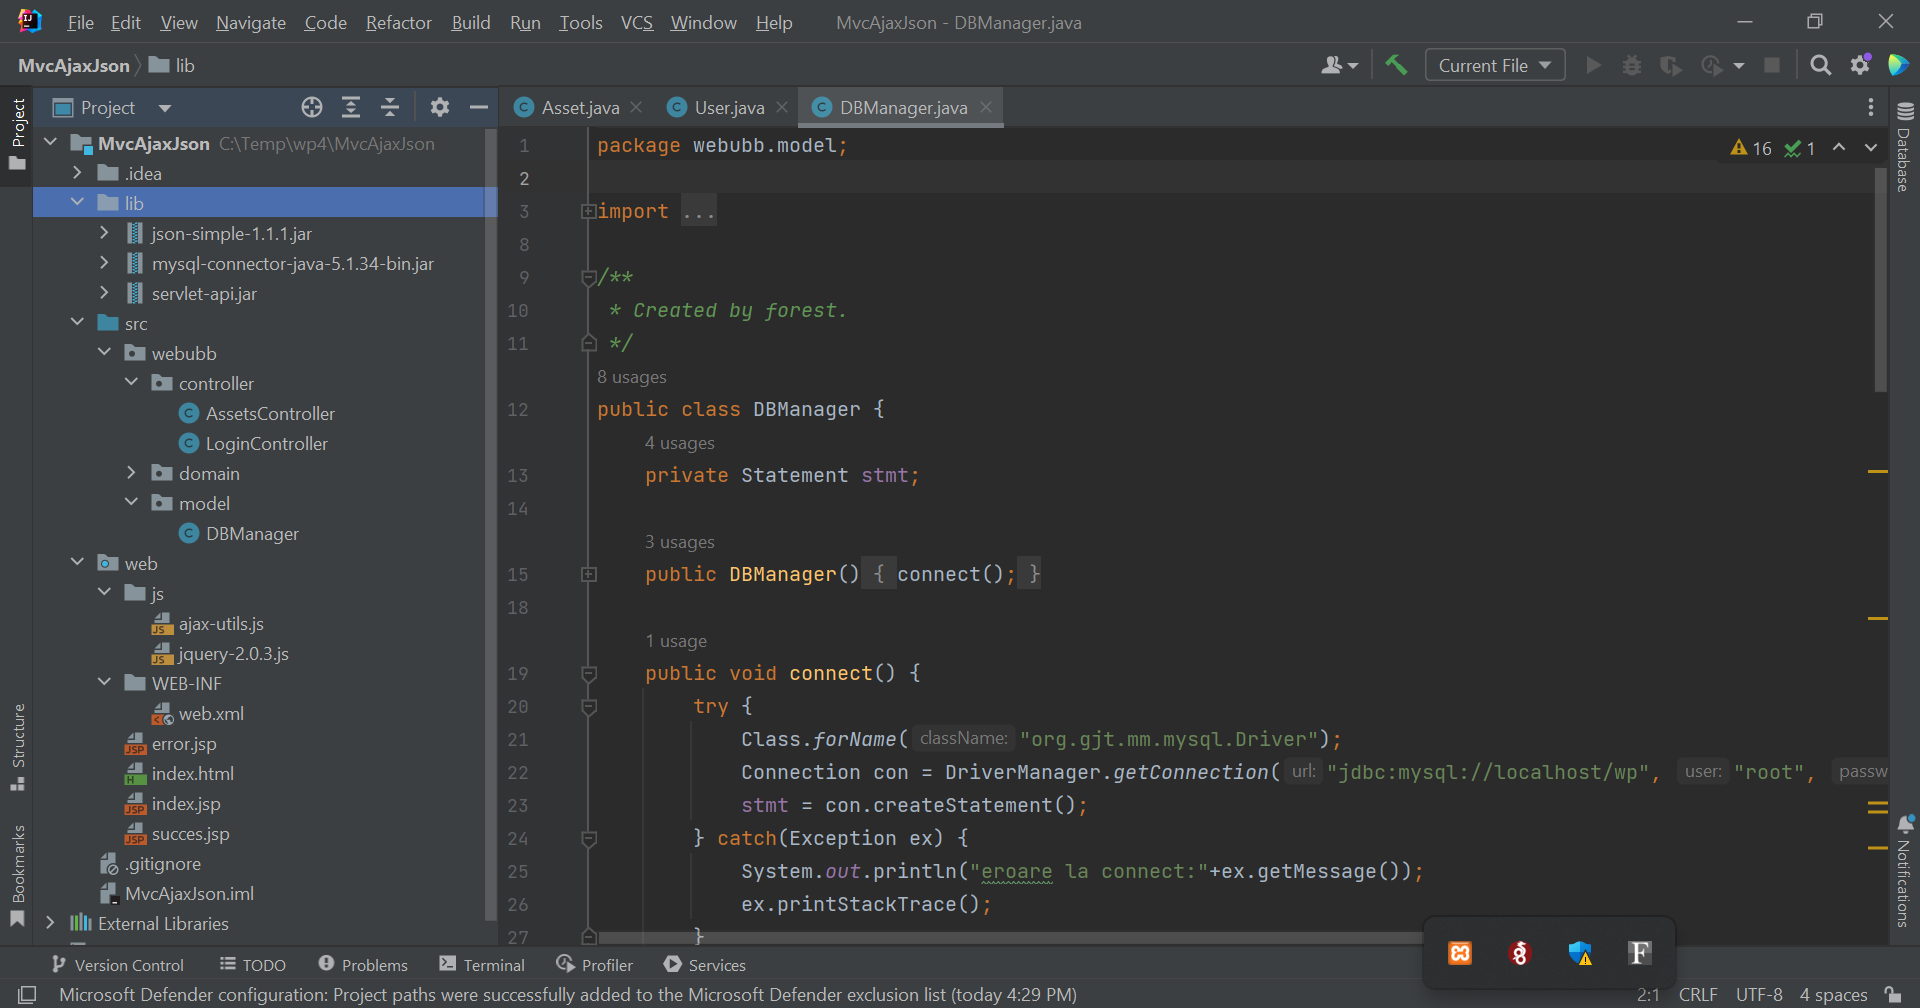
And, finally, the code source for the model class, DBManager. Normally, this class should have been placed in a repository.*
package and there should be another class in the model.* package wrapping the methods in the DBManager class, but I did not
want to complicate the project structure.
		package webubb.model;

		import webubb.domain.Asset;
		import webubb.domain.User;

		import java.sql.*;
		import java.util.ArrayList;

		public class DBManager {
			private Statement stmt;

			public DBManager() {
				connect();
			}

			public void connect() {
				try {
					Class.forName("org.gjt.mm.mysql.Driver");
					Connection con = DriverManager.getConnection("jdbc:mysql://localhost/wp", "root", "");
					stmt = con.createStatement();
				} catch(Exception ex) {
					System.out.println("eroare la connect:"+ex.getMessage());
					ex.printStackTrace();
				}
			}

			public User authenticate(String username, String password) {
				ResultSet rs;
				User u = null;
				System.out.println(username+" "+password);
				try {
					rs = stmt.executeQuery("select * from users where user='"+username+"' and password='"+password+"'");
					if (rs.next()) {
						u = new User(rs.getInt("id"), rs.getString("user"), rs.getString("password"));
					}
					rs.close();
				} catch (SQLException e) {
					e.printStackTrace();
				}
				return u;
			}

			public ArrayList<Asset> getUserAssets(int userid) {
				ArrayList<Asset> assets = new ArrayList<Asset>();
				ResultSet rs;
				try {
					rs = stmt.executeQuery("select * from assets where userid="+userid);
					while (rs.next()) {
						assets.add(new Asset(
								rs.getInt("id"),
								rs.getInt("userid"),
								rs.getString("description"),
								rs.getInt("value")
						));
					}
					rs.close();
				} catch (SQLException e) {
					e.printStackTrace();
				}
				return assets;
			}

			public boolean updateAsset(Asset asset) {
				int r = 0;
				try {
					r = stmt.executeUpdate("update assets set description='"+asset.getDescription()+"', value="+asset.getValue()+
							" where id="+asset.getId());
				} catch (SQLException e) {
					e.printStackTrace();
				}
				if (r>0) return true;
				else return false;
			}

		}
Step 4. Add other libraries to support the backend: mysql-connector-java-5.1.34-bin.jar,
servlet-api.jar, json-simple-1.1.1.jar
Since in this project, we are not using an automatic build system like Maven or Gradle, we have to add external jar library files
to the project manually. We need mysql-connector-java-5.1.34-bin.jar in order to connect to a MariaDB/Mysql database (you can download
the jar file from
here - choose the platform independent, zip version).
The servlet-api.jar contains the Java Servlet API implementations (i.e. the jakarta.servlet.* package) and is available in the
"lib" directory of the Tomcat server.
The json-simple-1.1.1.jar is just a simple JSON library and you can download it from
here.
After we download these three jar files, we add a new directory called "lib" into the project; this "lib" directory will
be placed on the same level as "src" and "web" source directories. And we add these three jar files into the "lib" directory.
Step 5. Add the aforementioned jar files as dependencies to the project
We first add these three jar libraries to the Project Libraries. Go to the "File\Project Structure" menu and then choose
"Libraries" under "Project Settings" and add the three jar files as in the following figure:
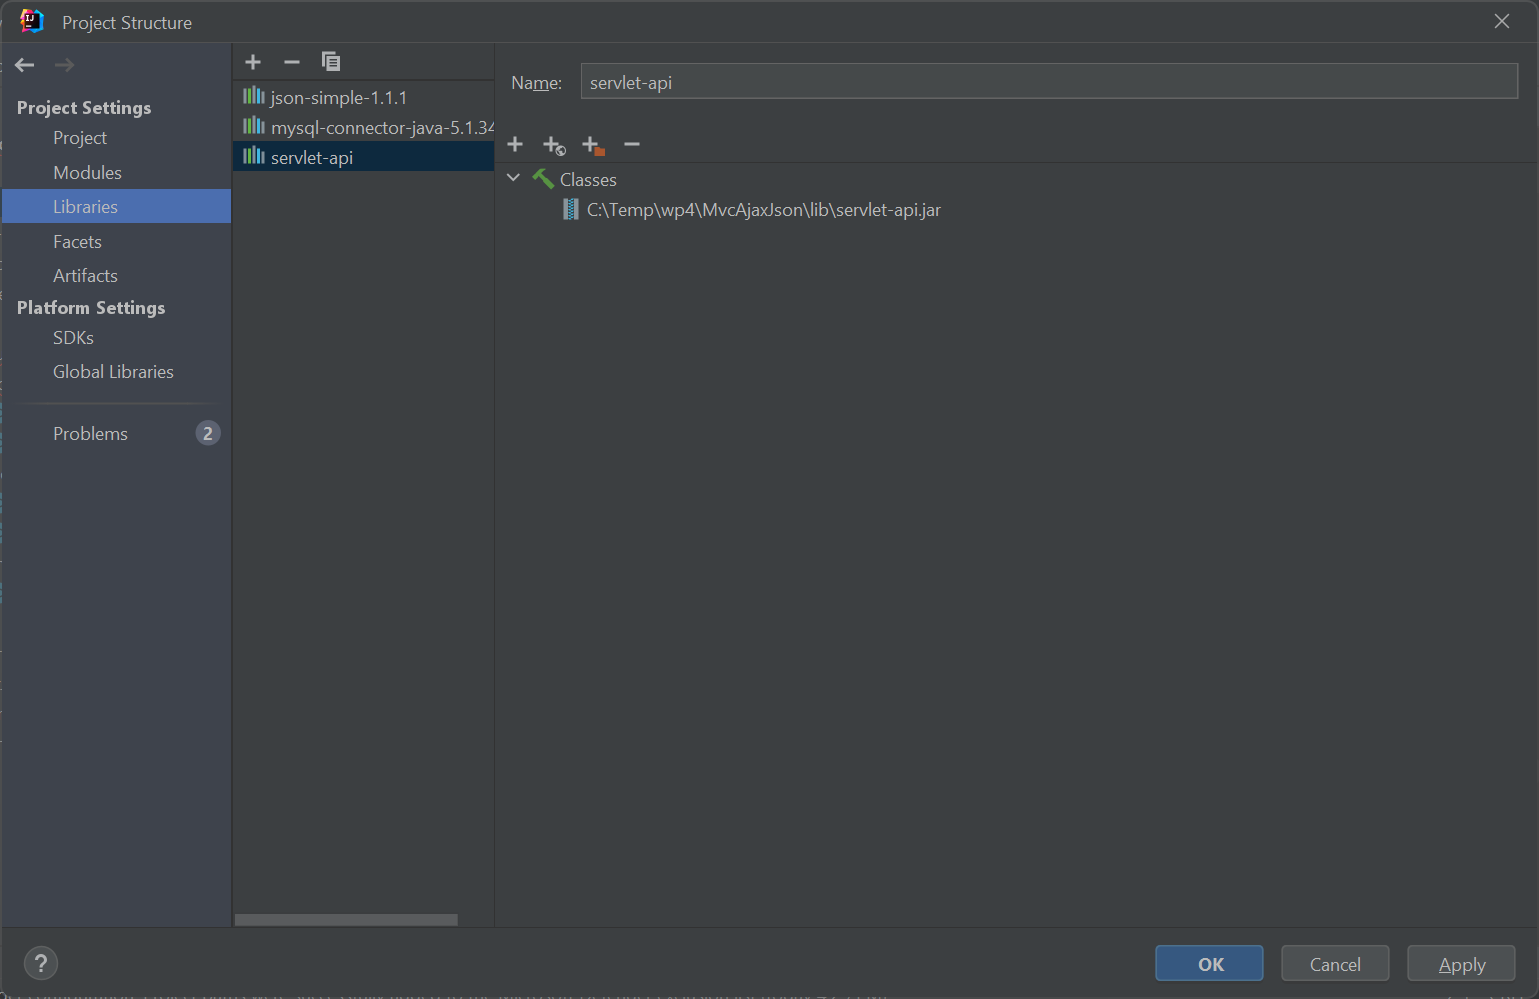
The "Libraries" under "Project Settings" define libraries that can be used by all the modules in this project as opposed by
the "Global Libraries" under the "Platform Settings" which contain libraries that can be used by all projects. A modules
is just a set of java class files and resources that produce the output in the same directory and a project is just a set of modules.
Jar files added to the "Project Settings\Libraries" section are not yet usable by our module, they must be added as dependecies to
our module. We go to the same menu "File\Project Structure" and under "Modules" we look for the "Dependencies" tab and we add our
jar libraries there:
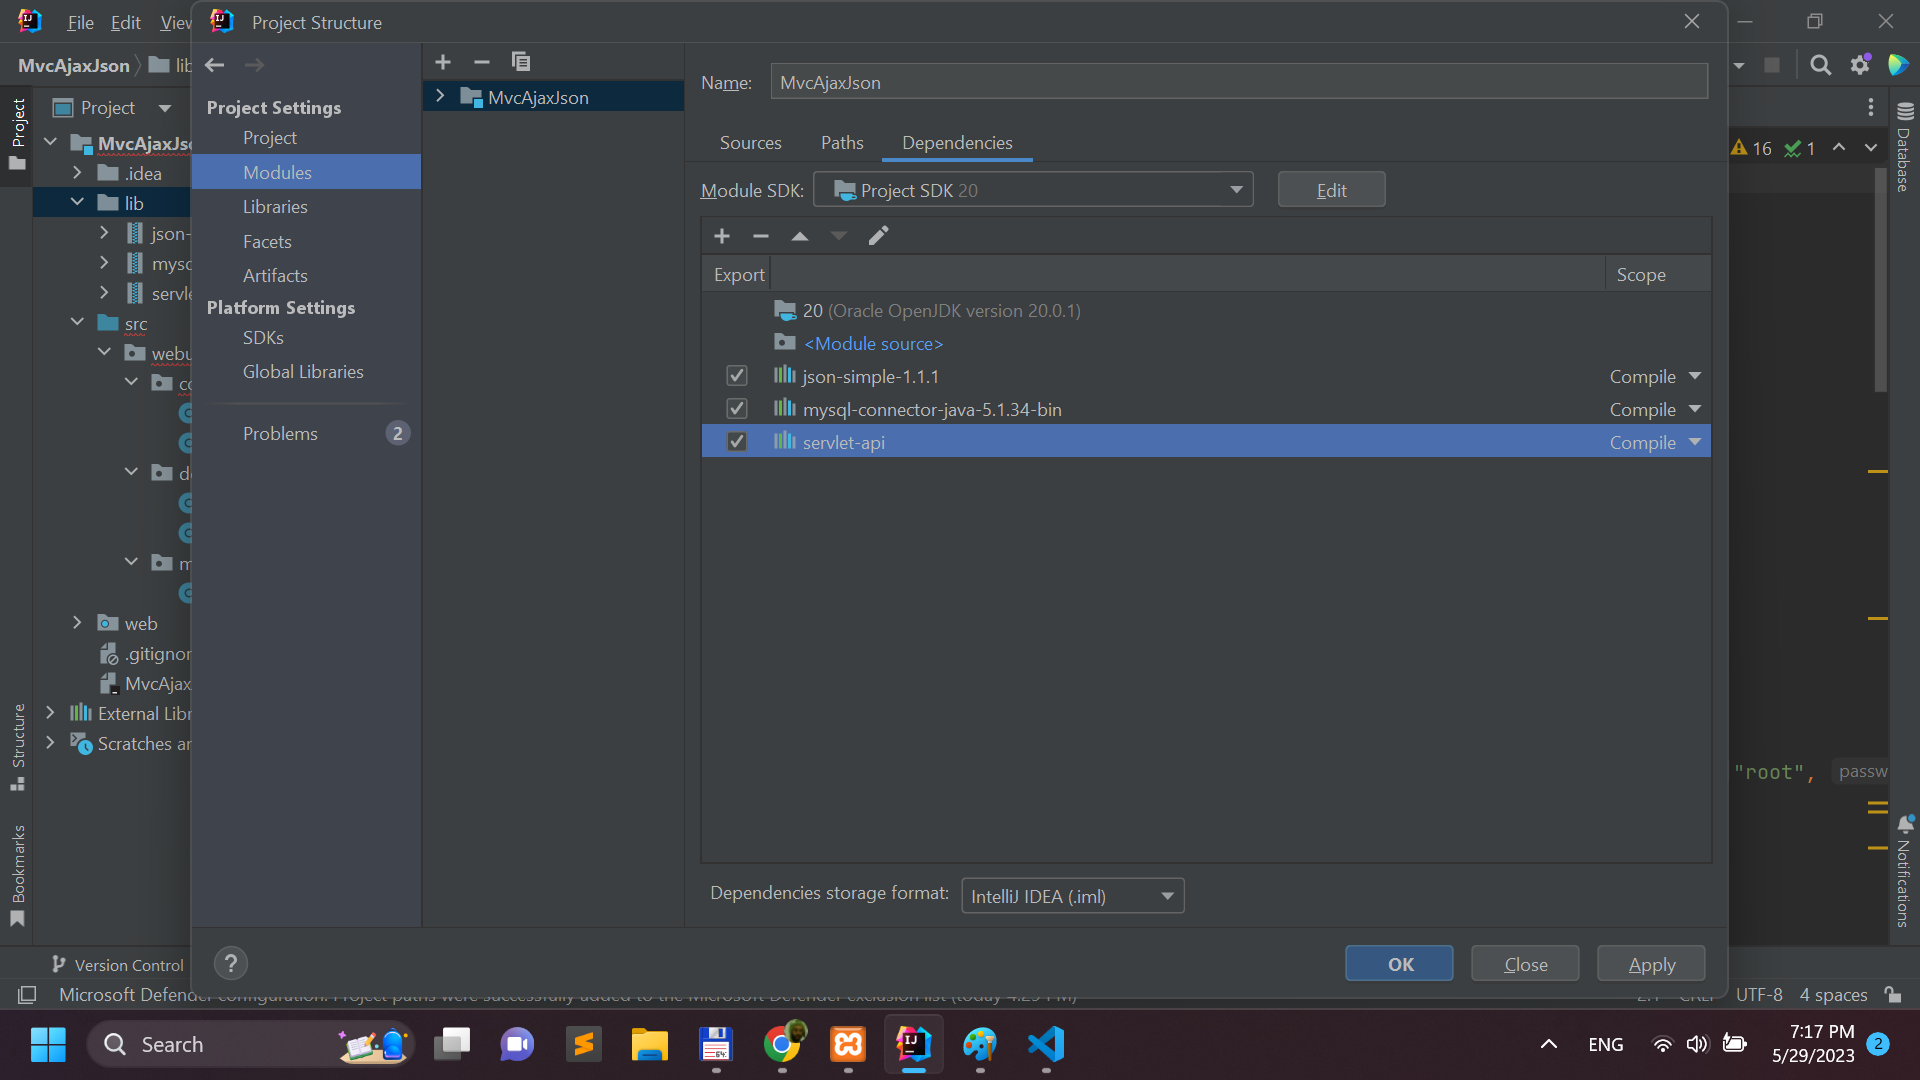
Sometimes, IntelliJ Idea automatically adds jar files as dependencies to the module immediately as we add them to
"Project Settings\Libraries" so we don't need to add them to "Project Settings\Modules\Dependencies" anymore. Now IntelliJ
Idea should remove the source code compile error notices.
Step 6. Add the front-end html,css,js and Jsp code to the "web" directory of the project
Next, we add all the html, css and js files, but also Jsp files for the front-end. A very important directory is the WEB-INF directory
which contains the very important web application descriptor WEB-INF\web.xml.
I will not post the source code of all these html, css, js and Jsp files - you can find them by downloading the whole project.
The WEB-INF\web.xml descriptor contains the mappings of the Java servlets (i.e. the LoginController and AssetController) to the
specific routes of the web app. The content of the web.xml file is shown below:
		<?xml version="1.0" encoding="UTF-8"?>
		<web-app xmlns="http://xmlns.jcp.org/xml/ns/javaee"
				xmlns:xsi="http://www.w3.org/2001/XMLSchema-instance"
				xsi:schemaLocation="http://xmlns.jcp.org/xml/ns/javaee http://xmlns.jcp.org/xml/ns/javaee/web-app_3_1.xsd"
				version="3.1">

			<servlet>
				<servlet-name>LoginController</servlet-name>
				<servlet-class>webubb.controller.LoginController</servlet-class>
			</servlet>
			<servlet>
				<servlet-name>AssetsController</servlet-name>
				<servlet-class>webubb.controller.AssetsController</servlet-class>
			</servlet>

			<servlet-mapping>
				<servlet-name>LoginController</servlet-name>
				<url-pattern>/LoginController</url-pattern>
			</servlet-mapping>
			<servlet-mapping>
				<servlet-name>AssetsController</servlet-name>
				<url-pattern>/AssetsController</url-pattern>
			</servlet-mapping>

		</web-app>
We can see for example that the servlet webubb.controller.LoginController is mapped to the route/url "MAIN_WEBAPP_URL/LoginController"
where MAIN_WEBAPP_URL = http://localhost:8080/MvcAjaxJson_war_exploded. The WEB-INF\web.xml descriptor is not absolutely required.
We could also configure the servlet-route mapping programatically using annotations like:
@WebServlet(name = "LoginController", urlPatterns = {"/LoginController"})
in the same java file where the LoginController servlet is defined.
Step 7. Configure Facets and Artifacts for the web application
Our next task is to configure Facets which are accessible in the "File\Project structure" menu and then option "Facets":
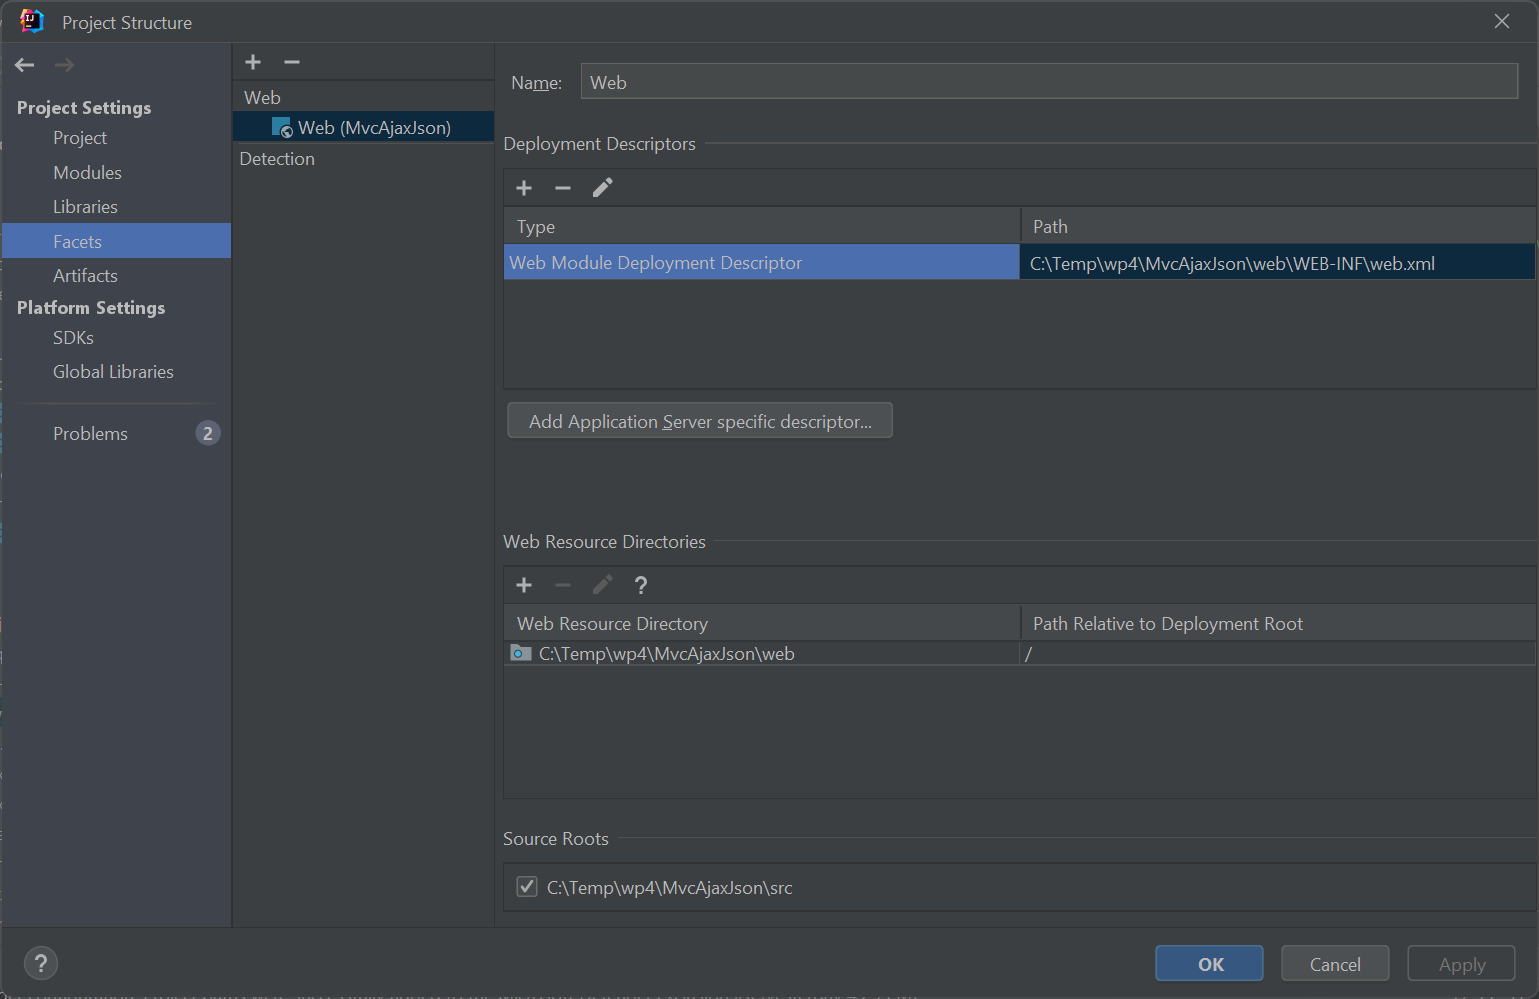
The web facet should have been automatically configured by IntelliJ Idea when we added the Web application framework support
in the beginning of this tutorial. We must make sure that the following variables are set as in the above figure:
Web Module Deployment Descriptor = C:\Temp\wp4\MvcAjaxJson\web\WEB-INF\web.xml
Web Resource Directory = C:\Temp\wp4\MvcAjaxJson\web, relativePath=/
The first line specifies the path of the web descriptor web.xml. The second line specifies the root url context (i.e. "/" )
where the root directory of the web app (i.e. C:\Temp\wp4\MvcAjaxJson\web) is mapped to.
Next, we must configure our artifact. An artifact is a war archive (i.e. a zip archive with a manifest file). This war file
should include all the front-end and back-end files, including the library files mysql-connector-java-5.1.34-bin.jar,
servlet-api.jar, json-simple-1.1.1.jar. The structure of the artifact is depicted in the following figure.
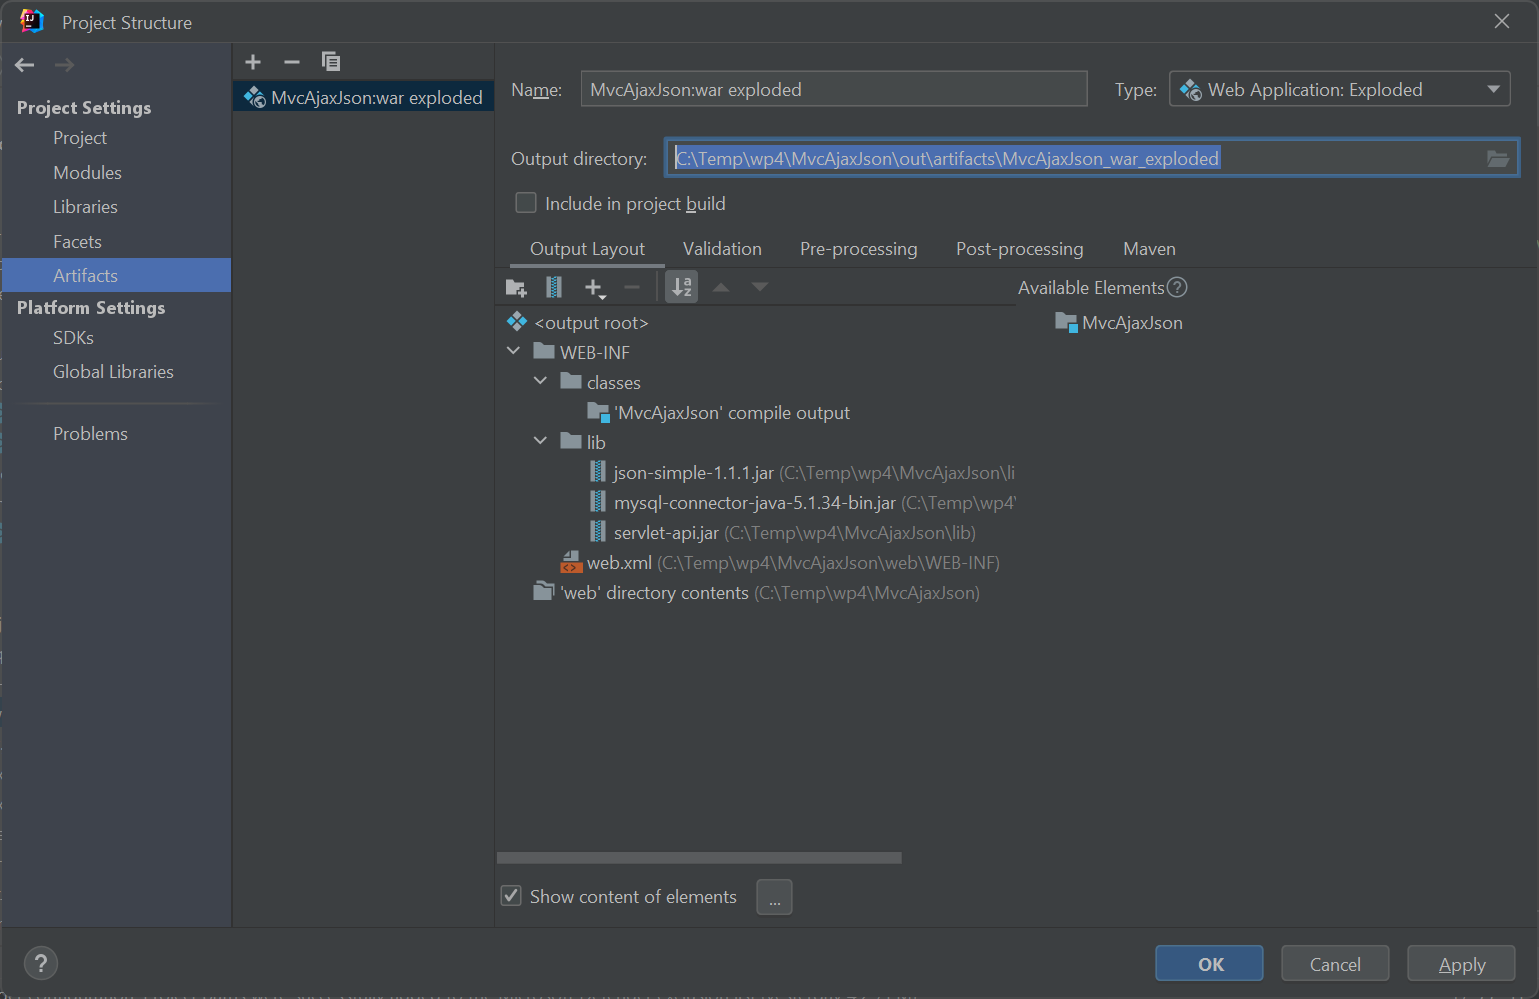
The "Output directory" value in the above picture is the path on the filesystem where we can inspect the unziped war file.
We also have to configure the SDK under "File\Project Structure" menu to point to the JDK (Java Development Kit)
installed in the system.
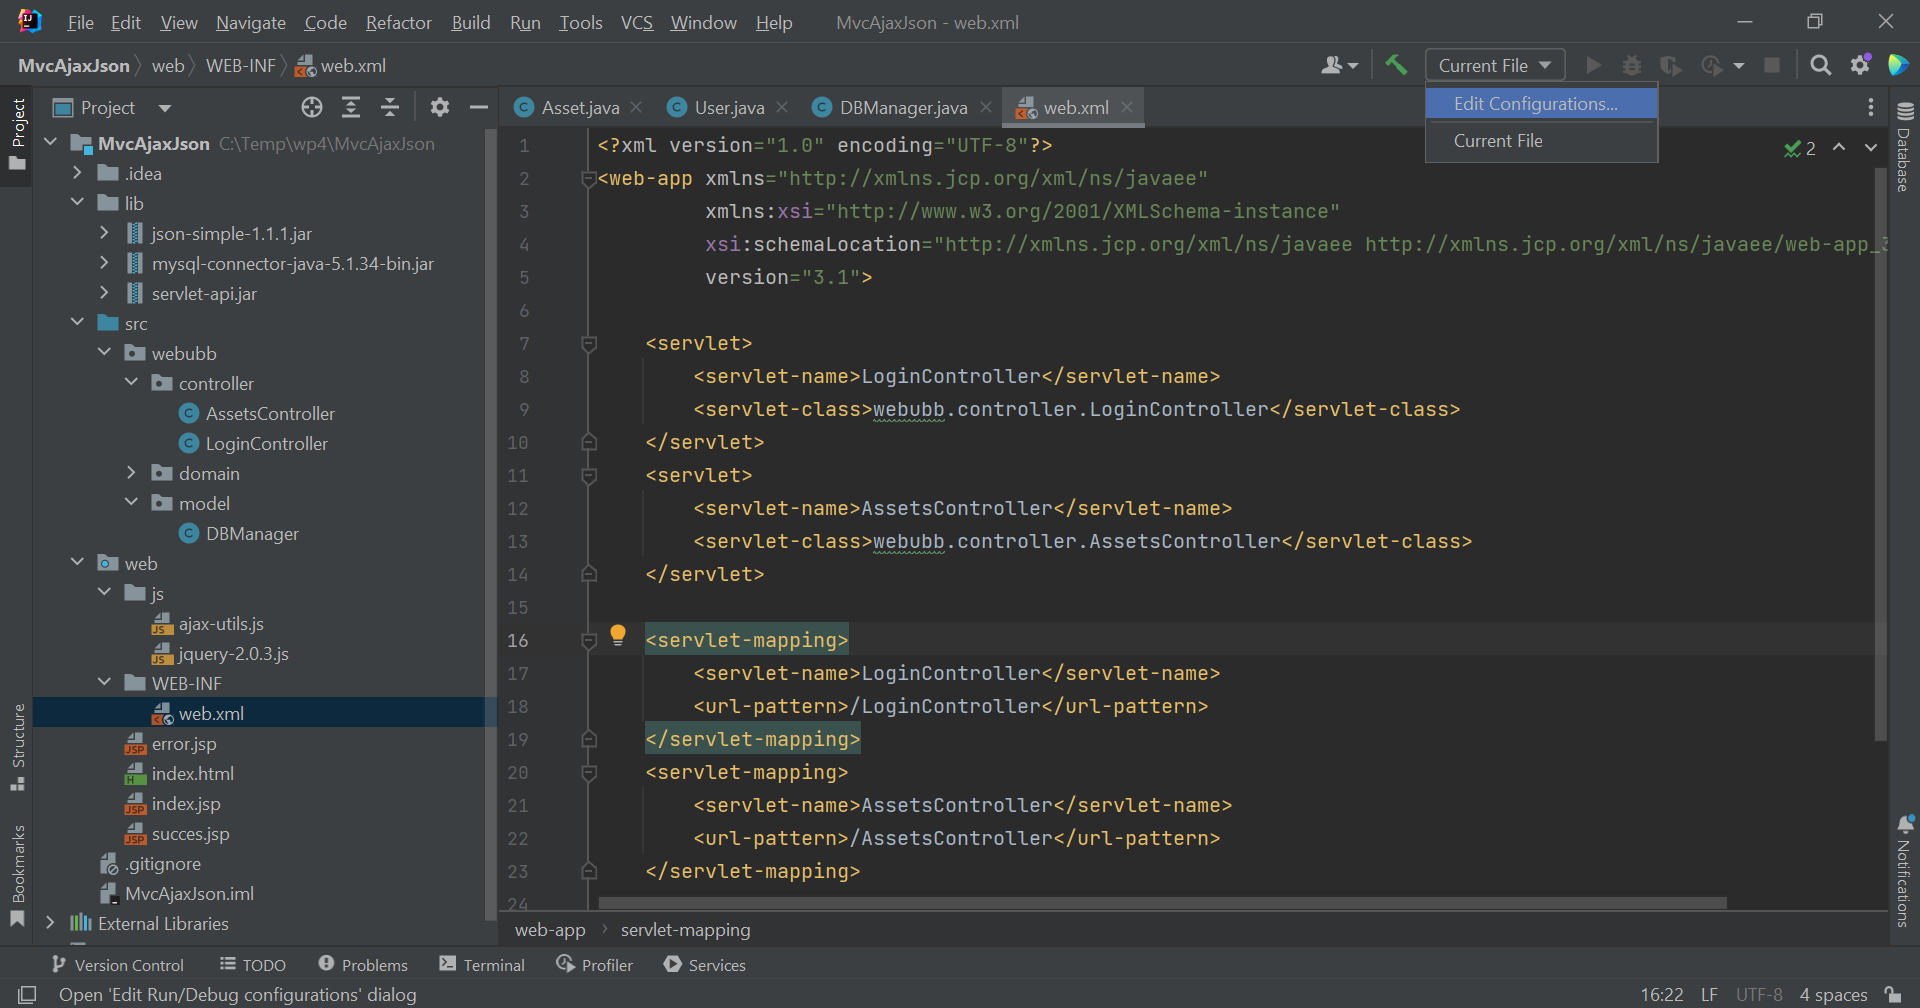
Step 8. Last step, configure "Run configuration" so that our web
application is deployed on Apache Tomcat
First, click on "Edit Configuration".
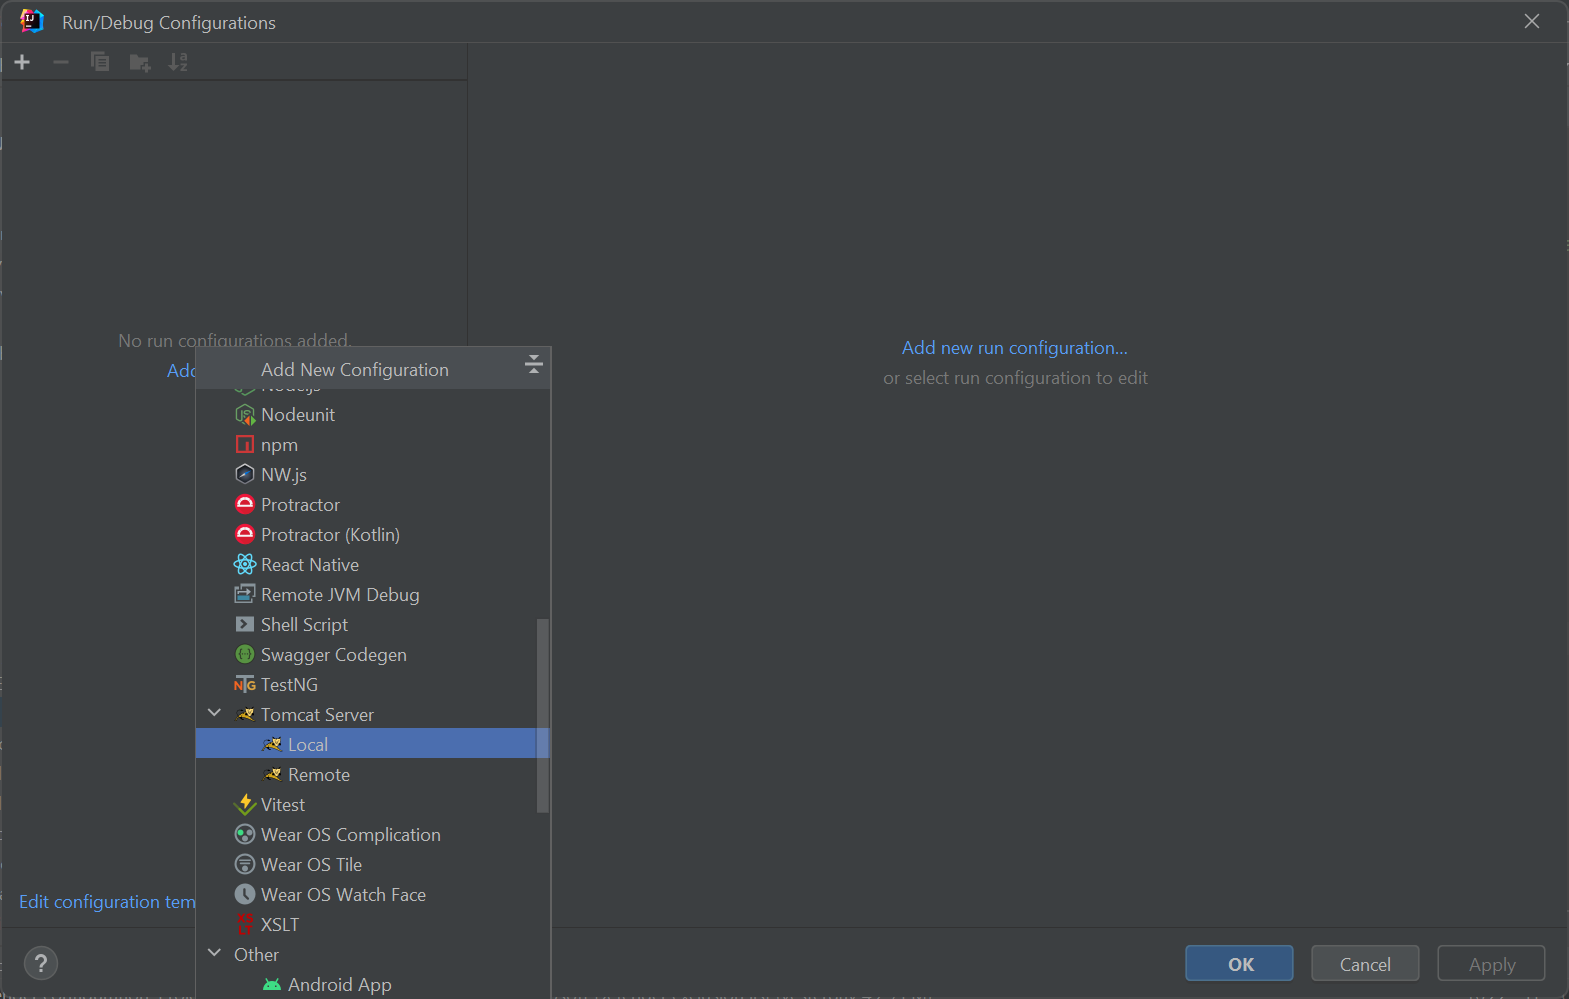
Then choose "Add new configuration" and "Tomcat Server" and "Local":
Under the "Server" tab, we must choose a Tomcat instance available on the local host. Also, under the "Deployment" tab
we must specify the artifact that will be deployed on the Tomcat server - usually IntelliJ Idea will show a warning
"No artifacts marked for deployment" with a "Fix" button that helps you set the artifact for deployment on Tomcat as
you can see in the following picture:
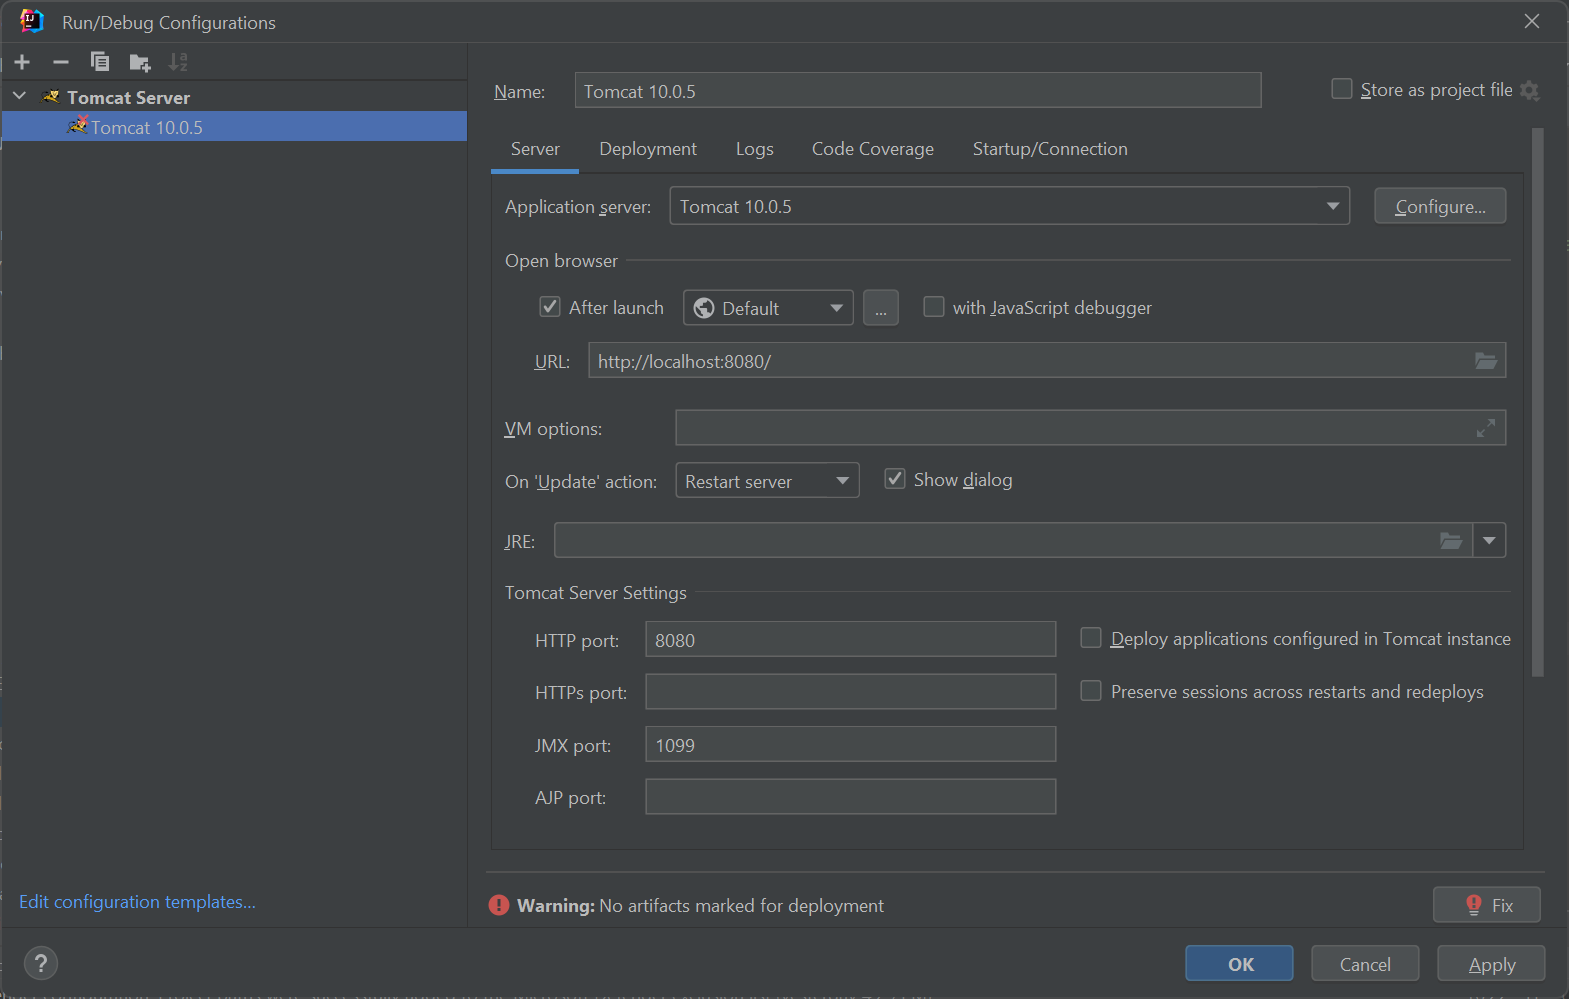
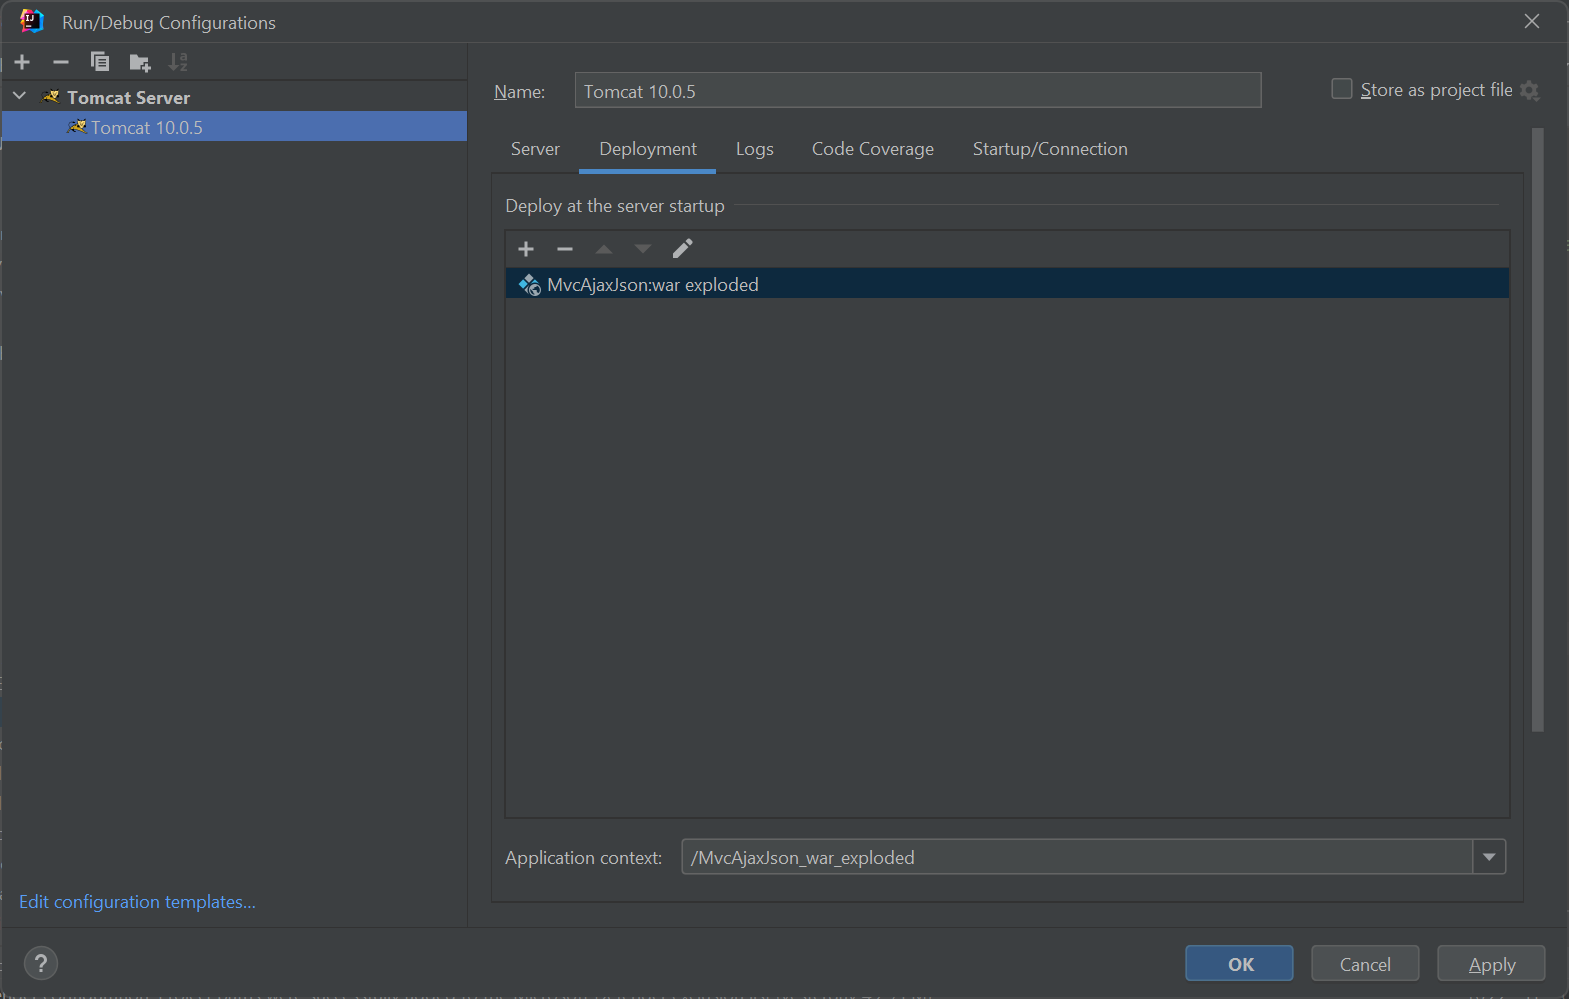
The main URL of the web app will be specified in the URL input under the "Server" tab in the "Artifact" section.
Now all we need to do is run the web application.